Monday, December 22, 2014

CLOTHESPIN COOKIES

Cookies Ready to Serve

No, you are not seeing things. My caption does say 'clothespin cookies.' Those of you who are familiar with my recipe blog posts already know that I like to make recipes that hold tradition with my family and my heritage. In the neck of the woods where I grew up, the Warren, Youngstown and Niles area of Ohio, these cookies were and still are all the rage. My mother made them for years and since she was so good at it, I never even tried making them. I finally decided to finally give them a whirl.

Rolling Out the Yeast Dough

The first problem I had was to actually find the old fashioned, doll head wooden clothespins that every woman of the 40's and 50's era used to hang clothes out on the line. The new ones are either plastic or are spring loaded. After searching all the clothes/laundry places in town and doing a web search, I found out that they are used for craft items today and I was going in completely the wrong direction. Finally, I found them at Joan Fabrics in the wood section.

Cutting the Dough

When my parents would come to visit for Christmas, they always had a huge box of them which were promptly placed in the refrigerator. They definitely need to be kept cool. It's amazing how delicious they are with the yeasty cookie and yummy filling. They melt in your mouth.

Cookies Wrapped and Ready for the Oven

Here is the recipe. I'm a bit late in the season posting it but if you don't have time to make before Christmas, they are still scrumptuous any time of the year.

CLOTHESPIN RECIPE:

Dough:

½ Package yeast (1 ¼ teaspoon)
¼ Cup Warm Milk
¾ Cup butter or margarine
2 Cups flour
2 Beaten Eggs
2 T. Sugar
½ teaspoon salt
Powdered Sugar

Soften yeast in warm milk. Set Aside. In a large bowl, cut 3/4c butter into 2 cups flour til mixture resembles coarse crumbs. Add yeast, beaten eggs, sugar and salt. Mix well. Form into a ball and cover tightly. Refrigerate overnight or about 6 hours. Divide dough in half. On a floured surface, roll each half into 10 “ strips. About 1/8th inch thick. Cut each long strip into approximately 3 strips of about 3” Wrap each strip around a buttered old fashioned clothespin, overlapping edges slightly. Bake on ungreased cookie sheet in 300 oven for about 30 minutes. Watch that they don't start getting brown, if so, turn over and continue baking. Remove from clothespins immediately when out of oven. Fill with filling. Sprinkle with powdered sugar and chill in fridge.

Filling:

1 c sugar
1 t. vanilla
1 cup butter
5 T. flour
1 cup milk
Whisk flour and milk together and heat on medium burner, stirring constantly. Remove from heat when it thickens. Cool to room temperature. Cream butter and sugar together til fluffy. Make sure there are no sugar grains left-beat for a long time. Add the cooled milk mixture and beat even longer till the mixture looks very light and whipped.

Tuesday, October 28, 2014

MY CHARLIE

MY CHARLIE

Charlie

I am dedicating this post to my dear Charlie. After the 30 years he and I battled schizophrenia, we finally lost to that devastating disease. I say he and I because I was with him every step of the way as was his entire loving family. Charlie never wanted fame and fortune, all he wanted was a chance to be like everyone else and lead a normal life. All who remember him say he was the most selfless person they ever met. He laughed all the time and bestowed little gifts to those he loved. He never refused anyone anything asked of him and he was big on thanking everyone for any kind thing they did for him. Charlie was an innocent and touched the heart of all who met him.

Charlie on recent kayake outing

A crater scooped out a hole in my heart since the day he left us. I can only hope that it will one day fill again with love. I have been cocooned in the womb of my home, Woodloft, since October 5th. I know that I will once again leave here to enter the world of people and life as it goes on for I have others to live for. If you see me out, know that I am hurting but that I am a survivor and will go on, one step in front of the other. I have hopes that one day soon the creative juices needed to create artwork will return. The art may be different for awhile because Charlie was my best art critic and I will be missing his sweet advice as I sculpt and paint. Thank you all for reading this sad post. I wanted you to know.

Much love,

Cheryl

Wednesday, October 1, 2014

THE BEST FROSTING I HAVE EVER TASTED

THE BEST FROSTING I'VE EVER TASTED

Vanilla Frosting With Chocolate Cake

Long ago, when I was a young girl, my best friend's mother would make an amazing cake every Friday. I did everything imaginable to get an invitation to spend the night with Karen so that I could taste a piece of that scrumptous cake. I especially loved the frosting. It was rich but not overly sweet. Years later when Pauline passed away, Karen and I were sorry that we had not thought enough to obtain the recipe from her. I don't think she even wrote it down. Just recently, with the help of google search, I finally found several recipes that were very similar to Pauline's. So, after much experimentation, I finally was able to duplicate it! To me, it brings back the days of my childhood and everyone who tastes this frosting, begs me for the recipe and tells me it is the best ever!

Fluffy, Rich and Decadent!

Here it is:

PAULINE'S FAMOUS FROSTING

Ingredients:

1 Cup sugar

1 t. vanilla

1 Cup butter

5 or 6 T. flour

1 Cup milk or a bit more

Method:

Whisk flour and milk together and heat on medium burner, stirring constantly. Remove from heat when it thickens. Cool to room temperature. Cream butter and sugar together till fluffy. Make sure there are no sugar grains left-in other words, beat for a long time. Add the cooled milk mixture and beat even longer. Beat til the mixture looks very light and whipped. I sometimes add chocolate syrup or other melted chocolate to create a chocolate frosting. It is delicious over chocolate cake.

Hope you agree with me!

Thursday, September 25, 2014

NINA'S GARLIC FARM

NINA'S GARLIC FARM

Most people wouldn't get excited about

THIS:

Garlic Labels-I Used Rocks Which I Painted With Acrylic and Sealed

or THIS:

Hard to Believe This Was Once A Steep Slope and Now Will Be the Home of my Garlic Farm

or THIS:

Look at the Size of the Late Italian Garlic!

or THIS:

The Elephant Garlic is the Size of a Softball!

or THIS:

Lots of Hay for Mulching-We are Supposed to Have a Very Cold Winter Here in Virginia

But I DO!

Since my grandchildren call me Nina, I thought it might be fun to use that name for my garlic farm. I was really excited when my first batch of seed garlic arrived from Territorial Seed Company over the weekend. I was anxious to dig in and make a dent in the hundreds and hundreds of seeds I must plant. After doing more research, I find that the best time to plant garlic in Virginia where I am, is October. So, I am putting it off for a few more weeks. Last year I made the mistake of planting in September and had several false starts whereas the greens from garlic grew pretty tall in warmer weather and then when we'd have a freeze, they would break off. This happened several times which I believe is why I ended up with rather small garlic. It tasted delicious though!

I painted a sign designating my garden and have painted several rocks in various colors naming each variety. I will spray them with a good sealer before placing outside.

Plans for the future for the garden include 3 tall sculptures of women with baskets. They will be either planting the garden or harvesting. I will use Ferro Cement, something I just learned about recently. After applying cement to my figures, I plan to mosaic their aprons and hats. I'm hoping to get these at least started before winter sets in. I tend to plan very big and sometimes things get done-other times, they stay on the back burner. Unfortunately, these tall sculptures have been on the back burner for several years. Now at least, I have a place I want to put them and maybe that will force me to get started.

I have a few garlic keepers for sale in my Etsy shop. Below are some pictures. Just click on my Etsy shop and take a look. You can purchase directly from there or send me an e-mail if you'd like any one in particular.

Luscious Brown

Rich Blue

Deep Purple

Tuesday, September 16, 2014

SACAJAWEA NATIVE AMERICAN ALTAR

SACAJAWEA NATIVE AMERICAN CEREMONIAL ALTAR

Sacajawea

Sold. Thank you Leslie!

It's been a busy summer for me. There has been lots of preparation for my new garlic farm and tending my other gardens plus replacing several of my appliances! Of course, I found time to sculpt and just finished a new altar.

Sacajawea was born in 1788. She was of the Shoshone tribe and is best known as interpreter and guide for the Lewis and Clark expedition. Her calm attitude and dispostion during the expedition was recorded by all the men who kept diaries during the journey to the western United States. At one point their boat was hit by a sudden storm and her fast thinking saved all the of the important paperwork floating in the water and also valuable books. If you would like to read more about her, there are a lot of online sources. I liked the way one of my faces turned out because she had a look of steadfastness-I used her in my Goddess Altar and thought it appropriate to name her Sacajawea.

Close-up

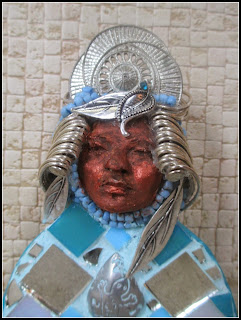
I used some beautiful irridized blue tiles and antique mirror in my mosaic of Sacajawea. She features one of my original stoneware clay faces. I decided to give her an ornate and stately headdress as well. She is 5"wide x 5" deep x 13" high. I have priced her at $125.00 The altar can be used for ceremonies or candles or even, as my son pointed out, a beautiful bathroom altar. If you are interested in purchasing her, you can do so directly from me by e-mail. You may also view more pictures of her on Etsy.

Close-Up of Mosaics

It Will Be Hard to Say Goodbye to Swimming

Planters Must Be Brought Inside Soon

Hip-Hop, Portulaca and Nustursium Overlooking the Grape Arbor

Hibiscus

More Nustursiums

Blackberry Wine

I just read a really good book. “Blackberry Wine” by Joane Harris. She is the woman who wrote that all time favorite (of mine at least) Chocolat. Harris writes her story in the viewpoint of...guess what? A bottle of wine! You will love it. I get all my books now on Amazon and it was at a discounted price-I think $1.99. What a bargain.

Well, I'm off to planting my garlic. When the garden is planted, I will show you a picture. Thanks for visiting. More next week.

Tuesday, September 9, 2014

MINERVA BURNING BOWL

Front View Minerva

Sold. Thank you Angely!

Here is another burning bowl from my “Crystal Woman” series. According to several online sources, Minerva is the name of the goddess of wisdom, medicine and crafts. Her name is linked to the Latin word mens which means "intellect," suggesting the intelligence and inventiveness of this ancient Goddess. It seems an appropriate name for her since she looks mysterious and wise with her crystals at hand for sacred medicine and healing ceremony.

Close-Up

For those of you who are new to my blog, the burning bowl is used at Unity, a non denominational church. Every New Year's Eve, members write down on a piece of paper all that they would like to see leave their lives, such as smoking, weight loss and you name it. The contents are then placed in a large cauldren type bowl and set onfire with, hopefully, all of the problems. It is a belief system, one of which has been used for hundreds of years around the world. I created personal burning bowls several years ago and many say they really work. I'm thinking that I may have to have a ceremony with my own burning bowl soon since I seem to have a dark cloud following me this summer. Lots of major appliance breakdowns, family members with problems and even b-dazle, my art car, gave me a real challenge last month. The brakes went out while I was on the way to the market! As you can see, I survived and will continue. Life goes on so we may as well have as cheerful attitude as we can, no matter what the circumstances. Enough of my philosophies for today.

Back View

Minerva is 5”wide x 5” high x 8 1/12” high. She is an original. I used stoneware clay and stained glass for her basin. If you are interested in purchasing her, I take Paypal or a personal check. You can e-mail me and we can go from there. If you would like to see more pictures, please visit my etsy shop where I have placed a lot of new art pieces recently. I have priced Minerva at $68.

Thanks so much for viewing.

Stained Glass Basin

Tuesday, August 26, 2014

CREAM PUFF CAKE

CREAM PUFF CAKE!

Eclair Cake

It's recipe time again. Found another one I had to share. I had a little swimming party last Saturday night and my friend, Anna, brought a delicious, unusual cake. It looks and tastes like a delectable cream puff. Honest. I am not sure where she got the recipe but we all loved it and I thought you might like it too. The name of it is 'Eclair Cake' but I renamed it because to me, it tastes exactly like a cream puff. After all, a cream puff by any other name is still a cream puff. LOL. It is every bit as good if not better after being refrigerated. Enjoy!

Here is what Anna said about it:

“The eclair cake is from the Atchafalaya Legacy cookbook a friend from New Orleans gave me. I'm almost embarrassed to give you the recipe. You won't BELIEVE how easy it is to make!!!! It will totally ruin my reputation. But here goes.

Ingredients:

1 box graham crackers in squares
2 small boxes vanilla instant pudding mix
3 cups milk (I used Homestead creamery regular)
1 (8 oz) Cool whip
1 can chocolate frosting (I used Duncan Hines dark chocolate fudge)
Method:

Do not grease pan. I used a 9x13" pan for this. Mix together the pudding, milk and Cool Whip. Layer a pan with graham cracker squares. Layer of pudding mixture. Another layer of graham crackers and another layer of pudding mix. Top with another layer of graham crackers. Put chocolate frosting in the microwave to soften (30 sec then another 30 sec worked for me) Pour over the top of the layer of graham crackers. Refrigerate at least 1 hour. Enjoy!!!!

This is so easy, you can make any time you need an easy dessert. Just be sure to leave enough time to chill in the frig.

Tuesday, August 19, 2014

GODDESS CEREMONIAL ALTAR

GODDESS CEREMONIAL ALTAR

Goddess Ceremonial Altar

New series! Well, it's a new series again I should say. I created 3 altars many years ago. They sold right away and for some reason on another, I never made any more. I sort of found out why when I started making them again. They are time consuming! I do have a lot of patience though-I mean, look at my B-dazle car! My art car took 6 years in the making and 23,000 beads. I started it in 2000 and finished in 2006. From then on it's been patch, patch, patch.

My B-Dazle Art Car

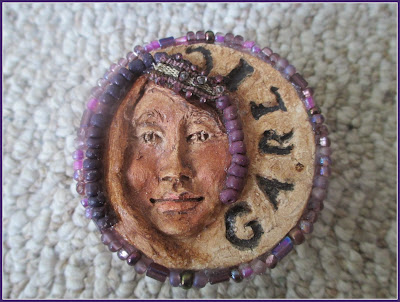
I created my altar with a clay base and used mosaic tiles and beads. I found a neat looking beaded pendant and used it for her 'crown.' She is approximately 4 1/2" wide x 5" deep x 12" high. You can use a candle for the base of the altar or put a small pot onto base for use as a burning bowl or incense. She makes a dynamic centerpiece wherever she is placed. She is priced at $115 and is available for immediate shipping. I accept Paypal or checks. You can e-mail me and we can go from there. Also, if you are local and want me to hold her for you and bring to the market on Saturday, I'd be happy to do so.

Close-Up

Tuesday, August 12, 2014

DECADENT GARLIC SOUP

DECADENT GARLIC SOUP

Garlic Soup With Garlic Keepers

I tried to come up with an appropriate name for the garlic soup that was served to me last week by a chef friend of mine. Chef Stratton hosts small dinner gatherings about every 2 months in his home for all of us who are fortunate enough to attend. The adjectives I considered were, scrumptious, delectable, luscious, delicious, yummy, pungent, extravagant, luxurious and the list goes on and on. I finally decided that the soup is richly decadent. Perfect name for it; Decadent Garlic Soup. I've printed the recipe below, with permission from Stratton. He says he doesn't remember how he came up with it but if I know him, it was from plenty of experimentation.

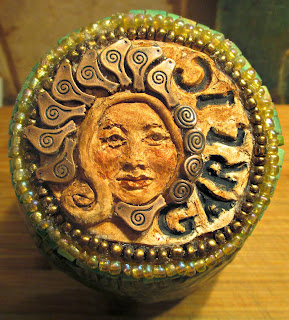
I have 2 of my garlic keepers for sale. Number 1 is very ornate. She looks sort of like a mosaic with her green trade beads. I have price her at $28. She is 3”wide by 3” deep by 4 1/2” high and has a green oxide glaze.

Sold. Thank you Mary and Doug

Garlic Keeper number 1

Garlic Keeper number 1

Number 2 is smaller with a dark green glaze with hints of blue and purple. Her beads are a deep purple shade. I have priced her at $22. She is 3” wide by 3” deep by 3” high.

Garlic Keeper number 2

Garlic Keeper number 2

You can e-mail me if you are interested in purchasing either or both of my latest Garlic Keepers. I accept Paypal or personal checks.

Here is the recipe for the soup. Hope you love it as much as I do. You might want to double this recipe because everyone who has a bowl, usually asks for more. It tastes great the first time around and every bit as wonderful the second or third day if left in the fridge.

DECADENT GARLIC SOUP

INGREDIENTS:

4 Whole garlic heads
1 Quart plus 2 cups chicken stock
6 egg yolks
1 Cup parmesan cheese, grated
1 T. Extra virgin olive oil
6 Fresh sage leaves
3 Sprigs of thyme
2 Whole bay leafs
S and P to taste

METHOD:

1. Peel and grate the garlic. I used my food processor.
2. Heat olive oil in large sauce pan. Large enough to hold 3 quarts
3. Add garlic and saute til it becomes golden.
4. Add whole herbs and saute briefly.
5. Add the chicken stock.
6. Bring to a boil, reduce heat and simmer partially covered for 30 minutes.
7. Remove whole herbs
8. Whisk together the egg yolks and parmesan cheese until thoroughly mixed.
9. While whisking, slowly drizzle 3 ladles of stock into the egg yolks and cheese.
10. Then, while whisking the stock, slowly stir back in the eggs, cheese and stock. This is called tempering. Must be done slowly so the eggs do not curdle.
11. Continue whisking until it comes to a boil. Remove from the heat and using an emersion blender, puree til smooth.
12. Taste and adjust seasoning with s and p if needed.
13. Garnish with fresh sage leaf in each bowl and a very small drizzle of olive oil. Now..sit back and enjoy the soup and the compliments!

Tuesday, August 5, 2014

THE HERBALIST GODDESS PLANTER

THE HERBALIST GODDESS PLANTER

Herbalist Goddess Planter

Several of my customers have asked me to create more of my planters with pots on top of their heads. Usually they are very large and therefore more expensive. So, I've sculpted The Herbalist planter quite a bit smaller and more affordable, plus, she is just the right size to fit most surroundings (and lighter too!) So here is your chance to own a very unique planter.

Close-Up of Dragonfly

Here is the story I have given to her.

THE HERBALIST

She is a teacher, healer, wise woman and keeper of the old traditions, Each day, with great reverence, she gathers the herbs for the needs of her many friends. Basil for love and good wishes, sage for wisdom and long life, rosemary for remembrance, lavender for devotion. Her garden is a special place. A place where birds and butterflys abound and where laughter and solitude each have their place and where some say, the secret to the universe can be found.....

~Cheryl Dolby~

Back

The Herbalist is 6 1/2 wide by 10" high and 4" deep. I sculpted her with stoneware clay and used stains and glazes for the finish. She is priced at $135. If you would like to purchase her, please e-mail me and we can go from there. If anyone from another country would like to purchase, I can check on shipping to your country.

Thanks for viewing.

Close-Up of Glaze

Tuesday, July 22, 2014

EASY WAY TO DRY HERBS

EASY WAY TO DRY HERBS
FEATURING NEW GODDESS TEA VESSEL

Goddess Tea Vessel

The easiest way I know of to dry herbs quickly is to gather and place in brown paper bag. Be sure to label it. Close and let dry in your car for about a day. End result is that your herbs are crisp dry and your car smells heavenly.

I've prepared a little video where you can watch the process. You can also review an earlier post on the subject of herbs.

Video

Close-Up

My latest Healing Woman Goddess Tea Vessel is 8” wide by 5” deep by 5” high.I use only lead free glazes and she features one of my hand sculpted bas-relief faces. She is $78. and can be purchased from me directly by contacting me at my e-mail address. I prefer to use Paypal but I also take checks.

Thank you so much for viewing.

Tuesday, July 8, 2014

NAMPEYO NATIVE AMERICAN PLANTER

NAMPEYO NATIVE AMERICAN PLANTER

Nestled in the Lobelia and Nasturtium plants

Nampeyo is the name of the Native American Hopi woman who taught me how to create polychrome pottery. I fell in love with the people-the Hopi tribe- who gathered at Isomata in the San Jucinto mountains of California. They traveled from the first mesa in Arizona. It was not only the teaching of making the sacred pots that endeared me to them, but the fact that I was able to listen to the stories the elders told while we waited for the for the sheep dung kiln, that we had built, to burn down and reveal our work. I wrote a story about Bonnie Nampeyo and created a special post about her and our class which you will find here.

Nestled in the Chives

In honor of Nampeyo, I have created this small planter which is 5"wide x8 1/2" high x 4"deep. I used stoneware clay which was fired to a high temperature so that she can remain outside all summer. I used some turquoise for embellishment. She is just $38. To purchase, please e-mail me and we can go from there. I prefer Paypal or a personal check.

Close-Up

NAMPEYO

In the village of Pollaca, Nampeyo hand sculpts the clay that she gathered from the ancient archeological site of Sikyatki. With Yucca brush in steady hand, she paints the same designs that were handed down from one generation of women to the next.

She works from sunrise til sunset so that she will have enough pots ready for the dung sheep firing that is the traditional kiln used by her people. Her life is not easy but she would have it no other way..for her’s is the life of the Hopi Indian.

Cheryl Dolby